
Surfboard Accessory Setup and Installation
Install surfboard accessories by preparing the relevant deck or mounting point first, then use the board’s actual attachment system: fully seat and secure matching fins, attach the leash through its intended attachment point, dry-fit and press the traction pad onto a clean, dry deck, and build textured surf wax on the standing area. Before use, verify secure fit, correct alignment, full adhesive contact where applicable, and usable deck grip.
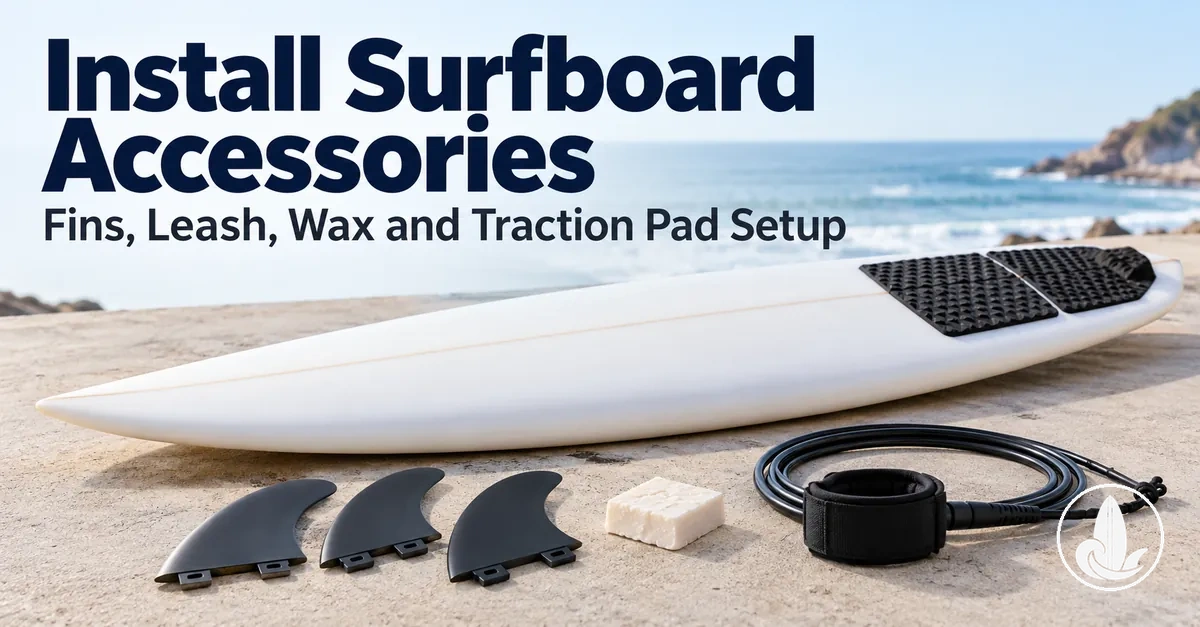
Surfboard accessory setup at a glance
Use the board’s mounting interface and the surface condition to choose the installation method. The ready state is defined by secure seating or attachment, correct alignment, sound adhesion, and appropriate grip.
Fins
- Match
- The fin base or tabs must match the board’s fin box or fin plug system.
- Install
- Orient, insert and fully seat the fin before engaging the system’s screw or lock.
- Ready state
- The fin remains fully seated and is not obviously loose at the mounting point.
Leash
- Match
- Use the board’s intended leash plug or other designed attachment point.
- Install
- Secure the leash string first, then connect the rail saver and leash to that retained loop.
- Ready state
- Both connection points remain firm: board to leash string, then leash string to rail saver/leash.
Traction pad
- Match
- Use a clean, dry deck area and confirm placement around the tail, fins and required fittings before exposing adhesive.
- Install
- Dry-fit first, then adhere without shifting the planned alignment and press every section evenly.
- Ready state
- The pad is correctly aligned with consistent deck contact; follow any manufacturer-specified bonding time before water exposure.
Surf wax
- Match
- Apply wax to the clean standing area of the deck, not the board bottom.
- Install
- Use a base coat only when the wax system calls for one, then build the working layer with light pressure.
- Ready state
- The standing area has textured, bumpy wax coverage rather than a smooth smeared layer.
Decision rule: do not force one universal sequence or fastener across every board. Complete each accessory’s own prerequisite, installation action and final check.
Accessory selection, fin-configuration choice, repair, replacement and long-term maintenance are separate from installation. When an accessory’s fastener, adhesive procedure or mounting interface differs from the general sequence below, follow the instructions for that board and accessory.
Table of Contents
Prepare the Surfboard for Accessory Installation
Preparation prevents avoidable fitting and adhesion problems. Check that the board, mounting points, accessories and required tools are ready before installation starts.
The core conditions are a clean working area, a dry surface whenever the fitting or adhesive method requires it, and unobstructed access to the relevant fin box, leash plug or deck area.

Verify the surface state and mounting interface before fitting because the required fastener, tool or adhesive condition is determined by the specific accessory and board system.
- Deck and surface: Check that the area being used is clean and free of contamination; where the installation method requires a dry surface, make sure it is dry so moisture or contamination does not interfere with adhesion.
- Fin mounting area: Check that each fin box or plug used by the fin system is clean and unobstructed so the fin can be fitted and secured using the fastening method specified for that system.
- Leash attachment point: Check that the leash plug area is accessible and unobstructed so the applicable leash string and attachment can be secured at the intended mounting point.
- Traction-pad area: Keep the intended traction pad placement area clean and, when required by its adhesive instructions, dry so the surface is ready for alignment and adhesion.
- Wax area: Check that the part of the deck intended for wax is clean and prepared for the wax procedure being used so surface contamination does not interfere with application.
- Tools: Have the tools required by the actual mounting system ready before fitting; the necessary tool or fastener is determined by the accessory and its mounting interface rather than by one common setup.
- Accessory condition: Check that each accessory and the fitting components required by its mounting method are present, clean where relevant, and ready for immediate fitting before attempting to secure or adhere them to the board.
Install and Set Up the Main Surfboard Accessories
The setup sequence should follow installation dependencies rather than a rigid accessory order.
Complete the prerequisite for the specific mounting or surface method first, then fit, adhere or apply the accessory only when that condition is satisfied.

- Confirm the prepared surface and mounting points. Begin only when the relevant deck area, fin box, leash plug, or adhesive surface is ready for the accessory being installed.
- Fit removable or mechanically secured accessories when appropriate. Fins and the leash attachment can be fitted and secured according to their respective mounting method once their mounting points are ready.
- Complete surface-dependent adhesion work. Position the traction pad only when its prepared deck surface meets the conditions required for alignment and adhesion.
- Apply deck grip where required. Apply surf wax to the applicable deck area when it forms part of the setup and the surface is ready for the relevant wax application.
For boards that combine removable fittings with surface-applied accessories, the relative order can change with board configuration and accessory type. Mechanical fitting, adhesion and waxing should each follow their own prerequisites; the detailed procedures below show those checks.
Fit and Secure the Surfboard Fins
Surfboard fins must match the board’s actual fin box or fin plug system, and their orientation must follow that interface.
Align, insert and fully seat each fin before engaging the system’s securing mechanism.

- Check the orientation. Align the fin in the orientation required by the board's mounting system, with its base or mounting tabs positioned for the corresponding fin box or fin plug; the fin should align with the interface before insertion.
- Insert the fin. Engage the fin using the insertion direction required by its mounting system; where that system uses downward pressure, press the fin into its mounting interface until it engages in the intended position.
- Seat the fin. Check that the fin is fully seated in the fin box or fin plug before fastening it; the base should occupy its intended installed position rather than remain visibly raised or partly engaged.
- Secure the fin. Where the system uses a screw, use the applicable fin key to tighten it after the fin is seated; where it uses a locking system, complete the locking action specified for that mounting interface. The fin should remain seated as it is secured.
- Check the secure fit. Check the installed fin at its mounting point; it should remain fully seated and should not be obviously loose in the fin box or fin plug.
A screw-secured fin box and a plug or locking system can use different insertion and securing actions, so the board’s actual interface determines the method. The final state is a fully seated, secure fin with no obvious looseness at the mounting point.
Attach the Leash String and Leash
Secure the leash string to the board’s intended attachment point before connecting the rail saver and leash.
The connection sequence is attachment point → leash string → rail saver and leash.

- Position the leash string. At a conventional leash plug, place or thread the leash string through the intended attachment point according to the plug design; check that the string follows the attachment path provided by the fitting.
- Secure the loop or knot. Form or position the leash string loop and knot as required by the attachment design, then check that the string is retained securely at the leash plug or other intended attachment point.
- Connect the rail saver. Connect the rail saver to the secured leash string loop as designed, then check that the leash remains firmly joined to the string through the rail saver.
- Check the completed connection. Check both connection points: the leash string should remain secure at the board's attachment point, and the rail saver should remain securely connected between the string and leash.
Plug and attachment hardware vary by board, so use the path intended by that design rather than improvising a universal attachment. Finish by confirming a firm connection at both the board-to-string and string-to-rail-saver points.
Position and Install the Traction Pad
Install the traction pad on a clean, dry deck, and confirm placement before exposing the adhesive.
Dry-fit the pad first so its sections align with the tail and fin area while required fittings such as the leash plug remain accessible.

- Dry-fit the traction pad. Place the pad on the clean, dry deck with its adhesive backing still covered, and align its sections in the intended arrangement before fixing any part to the board.
- Confirm the tail and fin relationship. Check the pad's position against the shape of the tail and the relevant fin area, while keeping required fittings such as the leash plug accessible. Placement should account for the board shape, pad design, and rider preference rather than assume one position for every board.
- Commit the adhesive. Once the alignment and placement are confirmed, expose the adhesive according to the pad's application method and bring the adhesive surface into contact with the deck without shifting the intended alignment.
- Press the pad evenly. Apply firm, even pressure across the traction pad so the adhesive contacts the intended deck area, including the edges and separate pad sections where applicable.
- Check the adhesion. Inspect the installed tail pad for consistent contact with the deck and confirm that its placement remains aligned around the tail and relevant fin area.
Exact placement varies with tail shape, fin layout, pad design and rider preference. After adhesion, check consistent contact across the pad and follow any manufacturer-specified bonding time before water exposure.
Apply Surf Wax to the Deck
Apply surf wax to the relevant standing area with light pressure, building a textured, bumpy grip surface rather than a smooth smeared layer.
Start with a clean deck surface in the standing zone; the board bottom is not the normal surf-wax application area.

- Prepare the standing area. Check that the relevant part of the deck has a clean surface ready for wax application, and focus the wax coverage on the area used for standing and grip.
- Apply a base coat when applicable. If the wax system or application conditions call for a base coat, apply it first as the underlying wax layer; a separate base coat is conditional rather than a requirement for every wax system.
- Apply the top coat. Rub the surf wax across the intended standing area with light pressure, building coverage over the prepared deck rather than forming a smooth smear.
- Build the wax pattern. Continue the application pattern across the standing area so wax bumps and an uneven texture develop over the required grip surface.
- Check the coverage and texture. Inspect the standing area for textured wax coverage and fill obvious gaps where needed while retaining the bumpy finish.
A base coat is conditional: use it when the wax system or application conditions call for one. The working top layer should finish with textured coverage across the intended standing area.
Check the Setup for Common Installation Mistakes
Check every installed accessory against its intended final state: secure fit or attachment, correct alignment, sound adhesion, and usable wax coverage.
A loose fin, insecure leash connection, misaligned or lifting traction pad, or smooth/incomplete wax coverage identifies where to inspect. The visible condition is a symptom to investigate, not proof of one specific cause.
Use the checklist below for immediate post-installation verification; ongoing wear, replacement and long-term maintenance require separate assessment.
- Fin — loose at the mounting point: If a fin remains loose, the installation issue may involve incomplete seating or the applicable screw or lock, depending on the fin system. As the corrective check, confirm that the fin is fully seated and that its specified securing mechanism is engaged correctly for a secure fit.
- Leash — insecure attachment: If the leash string, loop, or rail saver is not firmly retained at the intended attachment point, the leash attachment may be incomplete or incorrectly arranged for that board design. As the corrective check, verify the leash string at the intended attachment point and confirm that the loop and rail saver are securely connected according to that attachment system.
- Traction pad — incorrect alignment: If the traction pad sits outside its intended position around the tail, fins, or required fittings, the installation may have a placement issue. As the corrective check, compare the traction pad alignment with the intended position for the board shape and pad configuration.
- Traction pad — incomplete adhesion: If edges or sections are not consistently contacting the deck, the installation may have an adhesion issue associated with surface preparation or the pad's adhesive requirements. As the corrective check, inspect contact across the pad and confirm that the installed pad meets the applicable adhesive conditions.
- Surf wax — unsuitable grip coverage: If the surf wax is smooth, smeared, or visibly incomplete across the intended standing area, the application may not have produced the intended textured grip surface. As the corrective check, inspect the wax pattern and deck coverage and confirm a textured, bumpy finish rather than a smooth layer.